6 STEPS TO GLOWING SKIN – Safe & Effective Microneedling with Dr.pen M9
In professional aesthetic medicine, microneedling is widely used to improve skin texture, reduce fine lines, tighten pores, and repair acne scars. BuyDrPen.com has transformed this technology into a home-use device with standardized procedures, allowing you to gradually improve your skin in a safe and controlled manner.
Below are six professional steps compiled by BuyDrPen.com, each designed to help you care for your skin more effectively and gradually achieve your ideal complexion.
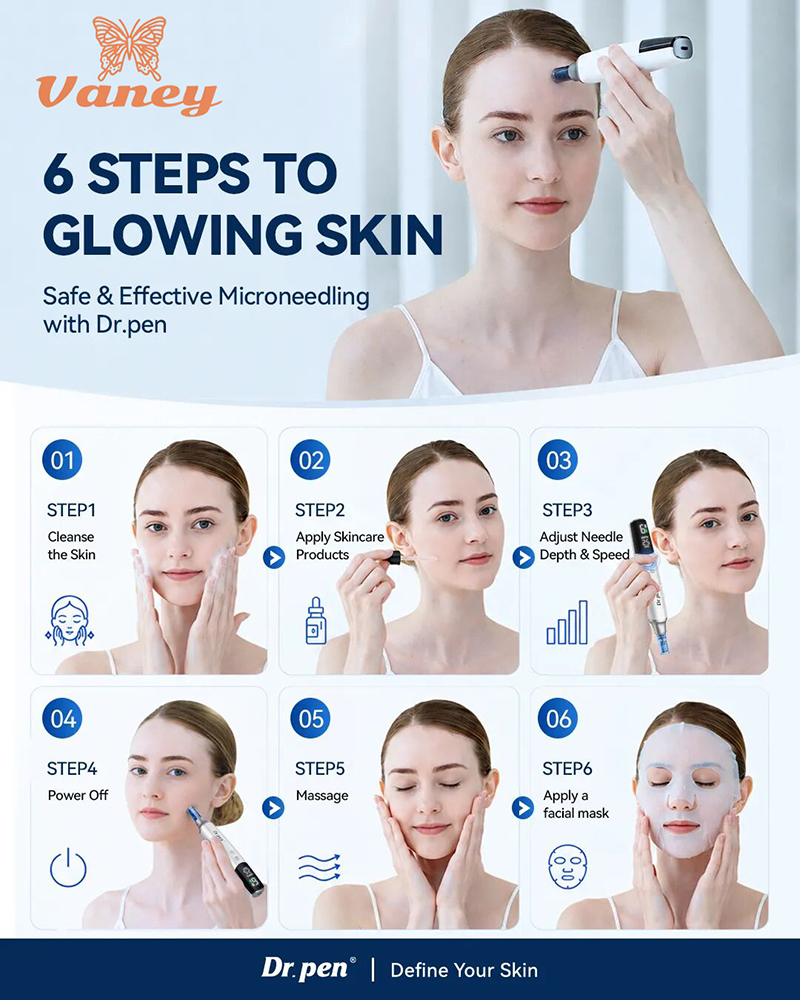
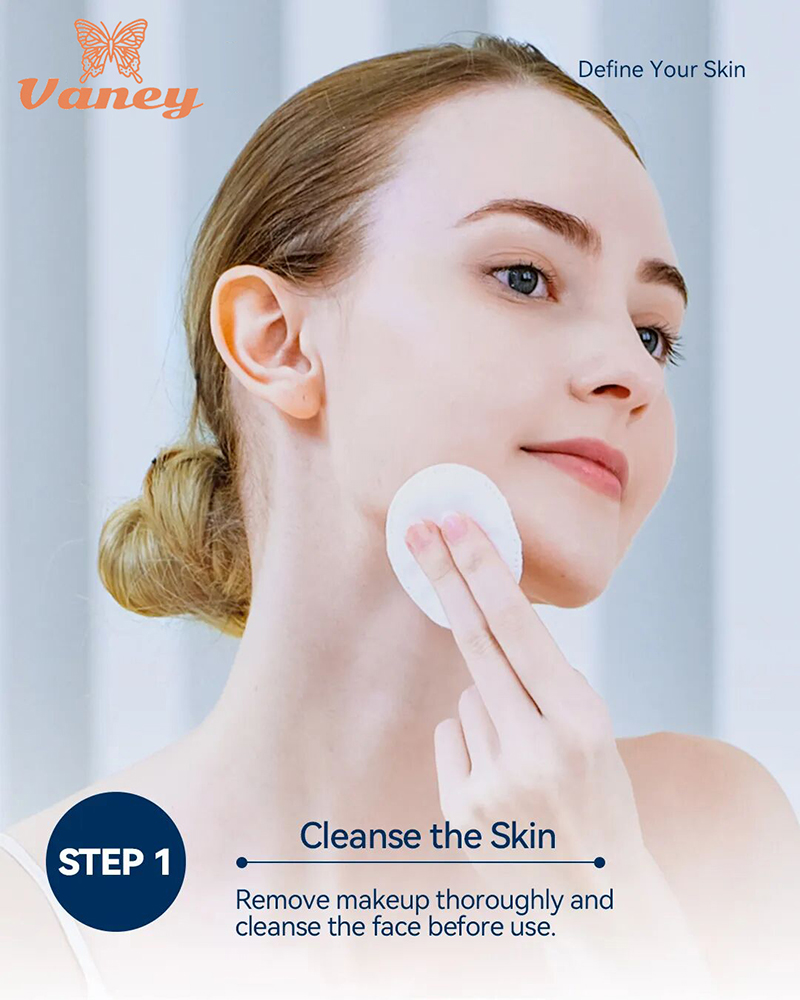
STEP 1. Cleanse Your Skin
Before microneedling, cleanse your skin gently to remove surface oils, dirt, and dead skin cells. Clean skin not only ensures a safer treatment but also allows better absorption of subsequent skincare products. After cleansing, avoid using products containing alcohol, acids, or high concentrations of active ingredients to prevent increased skin sensitivity.
STEP 2. Apply Skincare Products
Before microneedling, choose skincare products suitable for your skin type, such as specialized serums or moisturizing creams, and apply them evenly to the treatment area. During the procedure, if the skin becomes dry, you can reapply as needed to keep the skin hydrated, ensure smooth needle movement, and enhance the absorption of nutrients.

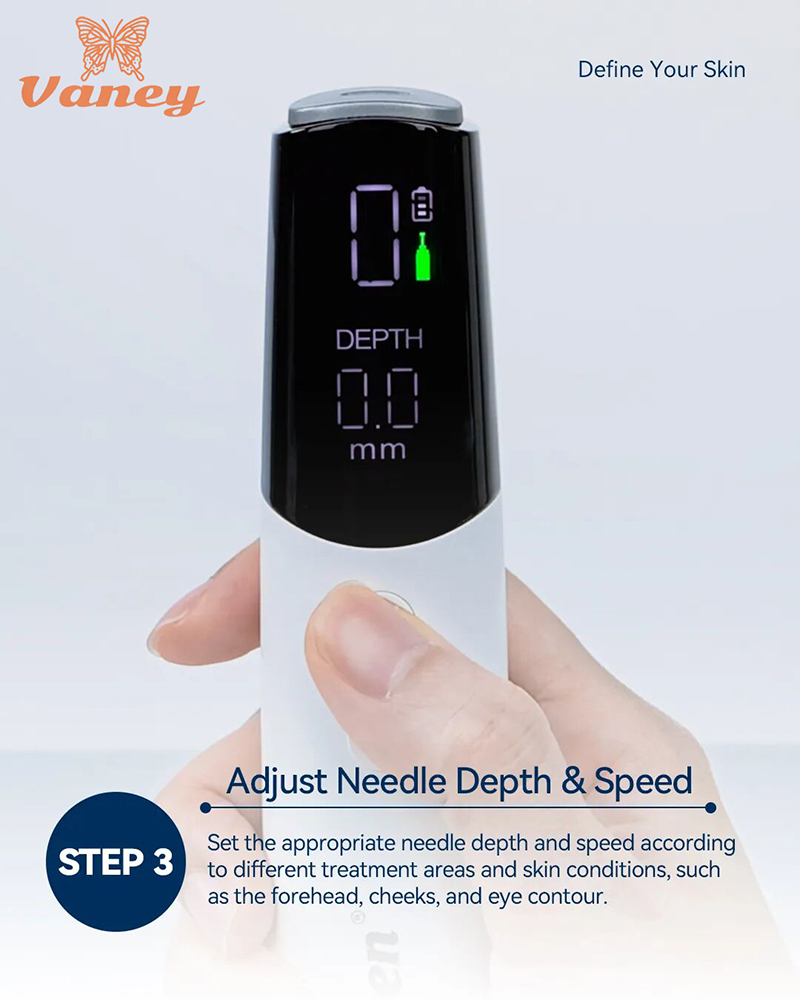
STEP 3. Adjust Needle Depth & Speed
Before starting the treatment, adjust the needle depth and speed of the microneedling device according to the specific area being treated and your skin type. The skin on the forehead, cheeks, and around the eyes differs, so choose the appropriate depth and speed for each area. It is recommended to start at the lowest setting and gradually increase to ensure safety and comfort.
Once cleansing, soothing, and parameter adjustments are complete, you can begin microneedling. Apply the needle evenly over the target areas, avoiding prolonged contact on any single spot to prevent over-stimulation. The procedure typically lasts 10–20 minutes, and a uniform, slight redness is sufficient—there’s no need to pursue a strong reaction.
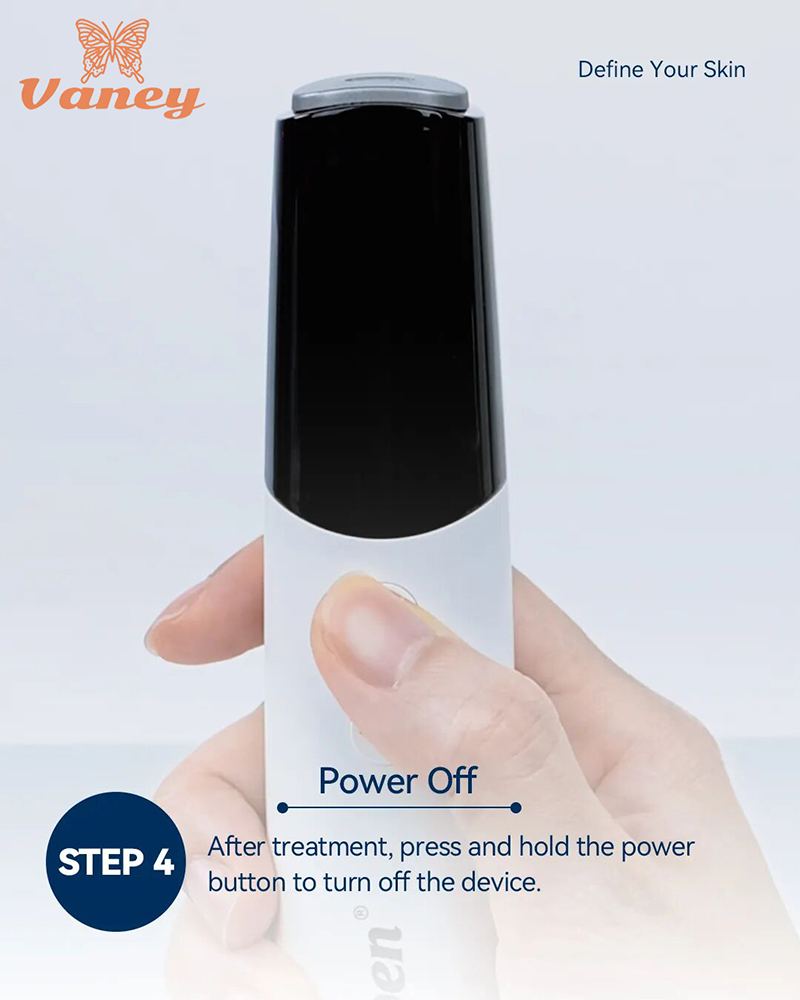
STEP 4. Power Off
After the treatment, press and hold the power button to turn off the Dr.pen M9 and dispose of the disposable needle to avoid risks associated with reuse. Clean and disinfect the device, then store it in a dry, clean place. At this stage, the skin is slightly open, so avoid touching it with your hands and do not immediately apply products containing alcohol or fragrances, allowing the skin ample time for protection and recovery.
STEP 5. Massage
After completing the microneedling treatment, gently massage the treated areas to help skincare products absorb better, while promoting blood circulation and enhancing the skin’s repair process. Use light, gentle motions to avoid overstimulation of the freshly opened skin channels.

STEP 6. Apply a Facial Mask
Finally, provide your skin with repair and hydration. Apply a soothing or moisturizing facial mask and leave it on for about 15 minutes to allow nutrients to fully penetrate and lock in moisture. Afterward, gently pat the skin to aid absorption, and avoid using any harsh or irritating products immediately, giving your skin ample time for recovery and protection.

Dr.pen is more than just a beauty device; it is a controlled and repeatable skin management system. Only by following the standardized procedures can you truly achieve “Define Your Skin”—creating healthy skin that belongs uniquely to you.